78
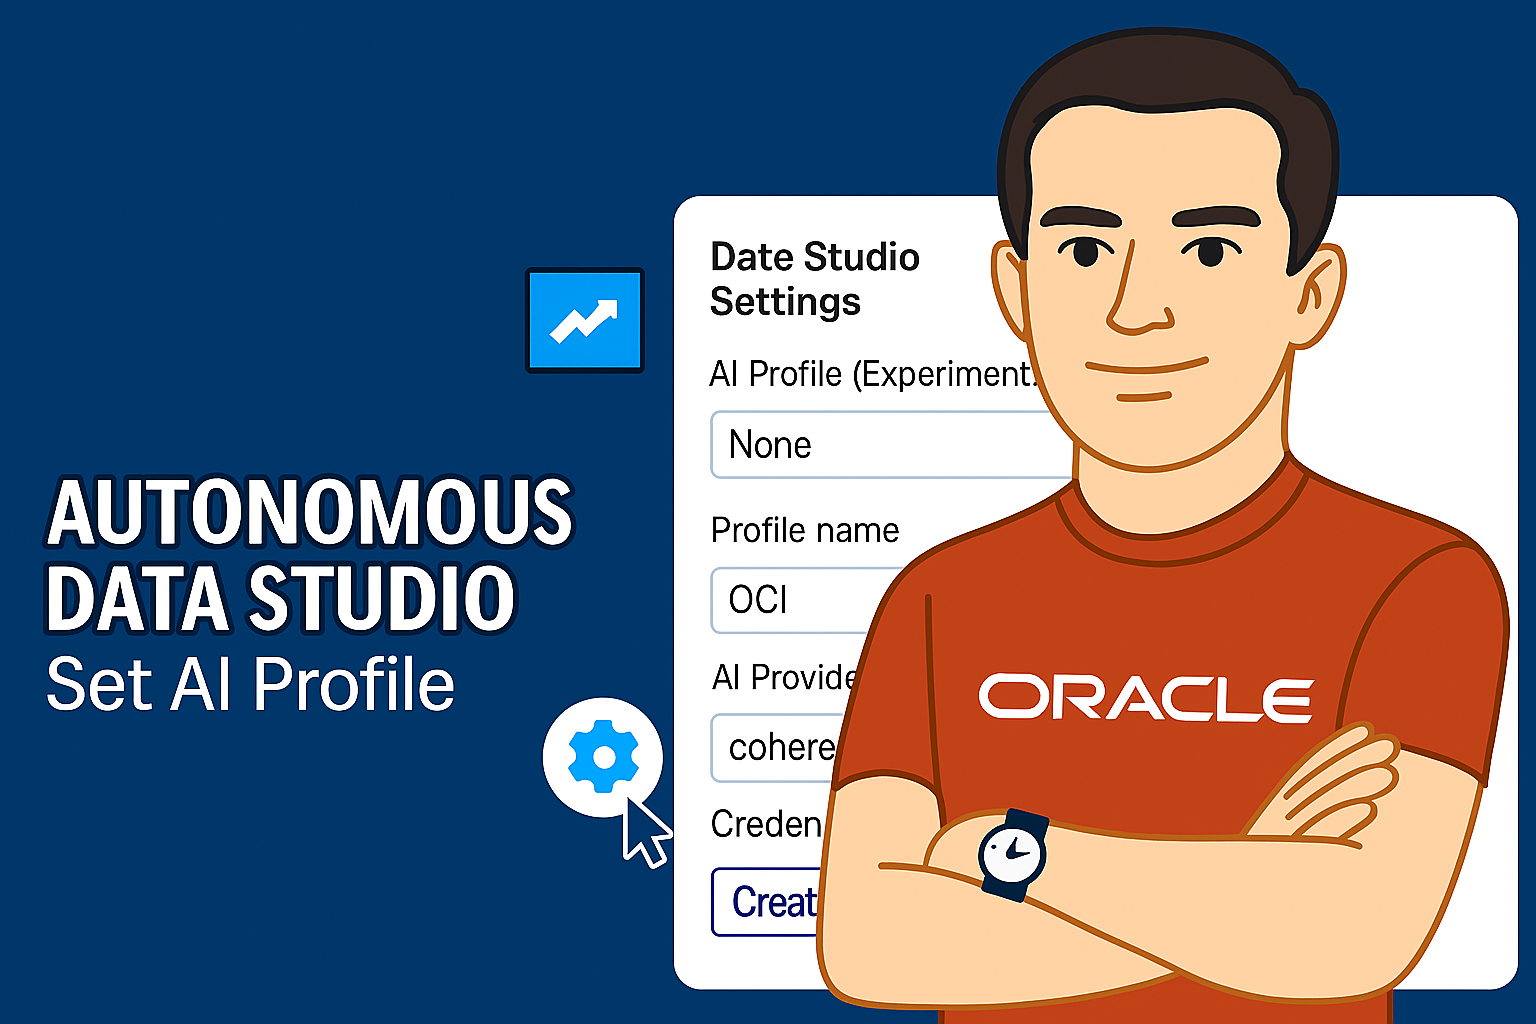
In this post, you’ll see how to select and configure your AI Profile in Data Studio’s Data Preferences—a step that may seem minor, but is absolutely essential. This configuration establishes secure connectivity to AI services, enables translations and PII detection during data load jobs, and powers conversational AI features in Data Studio such as Table AI Assist and natural‑language‑to‑SQL query generation.
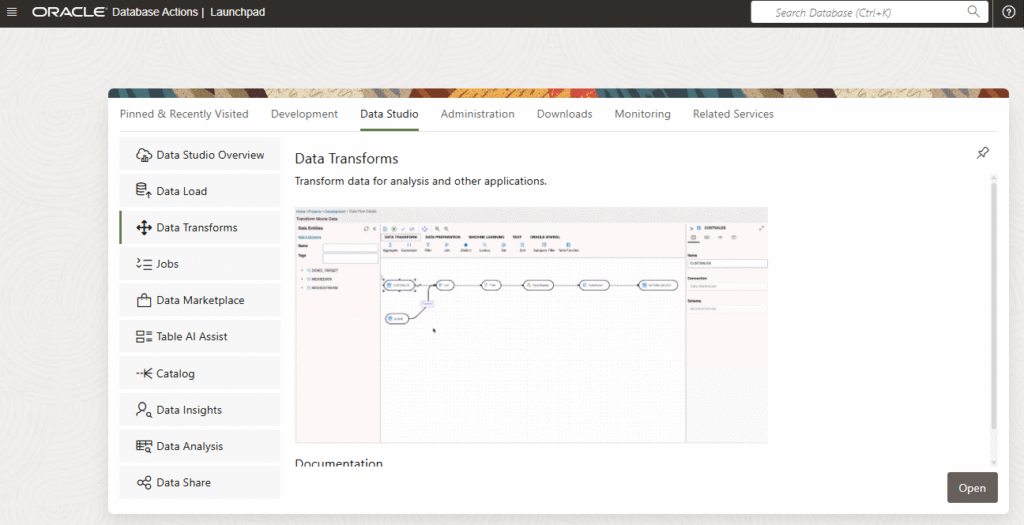
Once you are in the Database Actions menu, select the Data Studio tab and select Data Studio Overview.
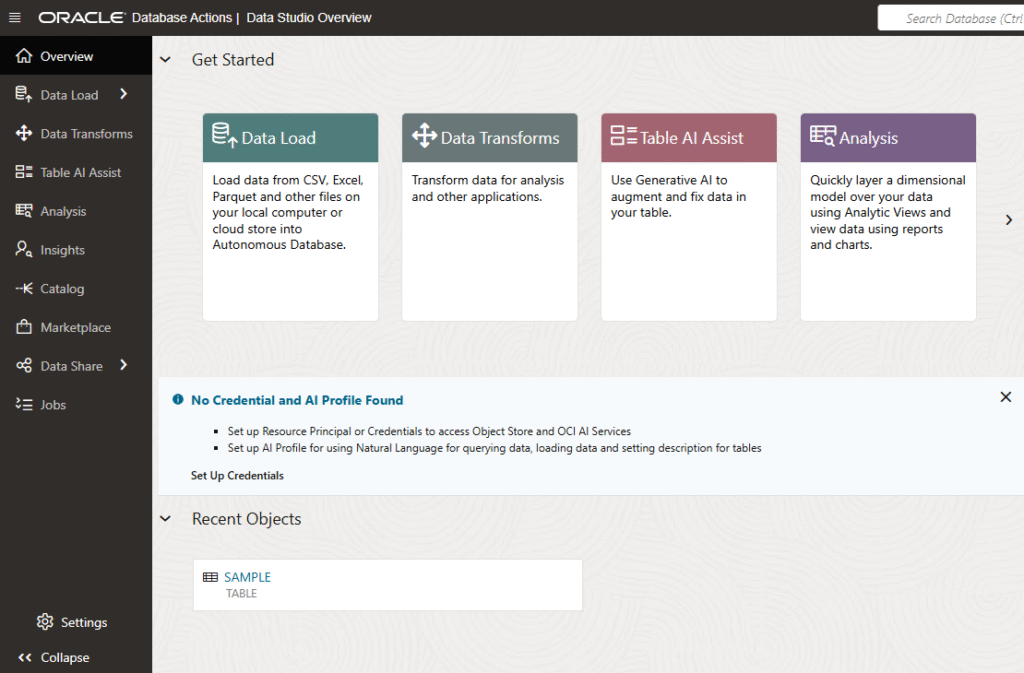
At the bottom you can see the Settings. Click it. Also you can see some information warning saying that this is not configured and is highly recommended to take advantage of all the capabilities.
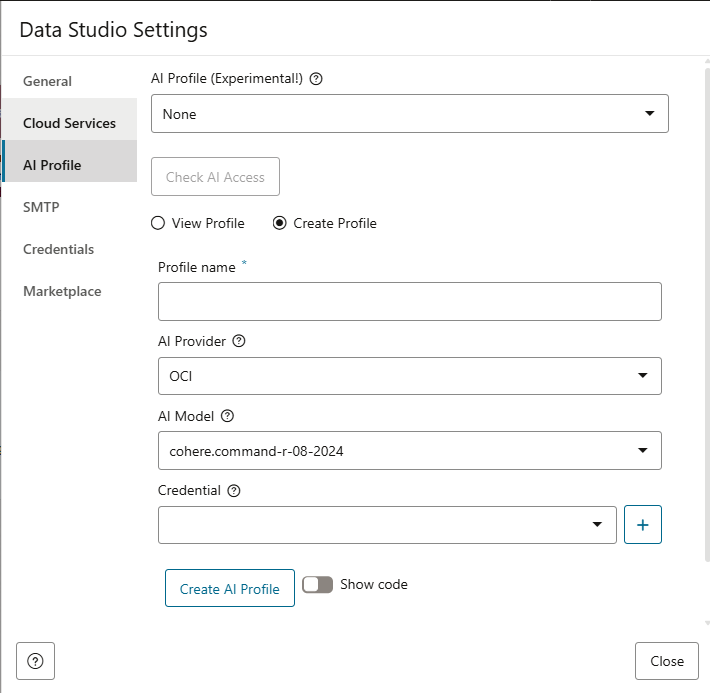
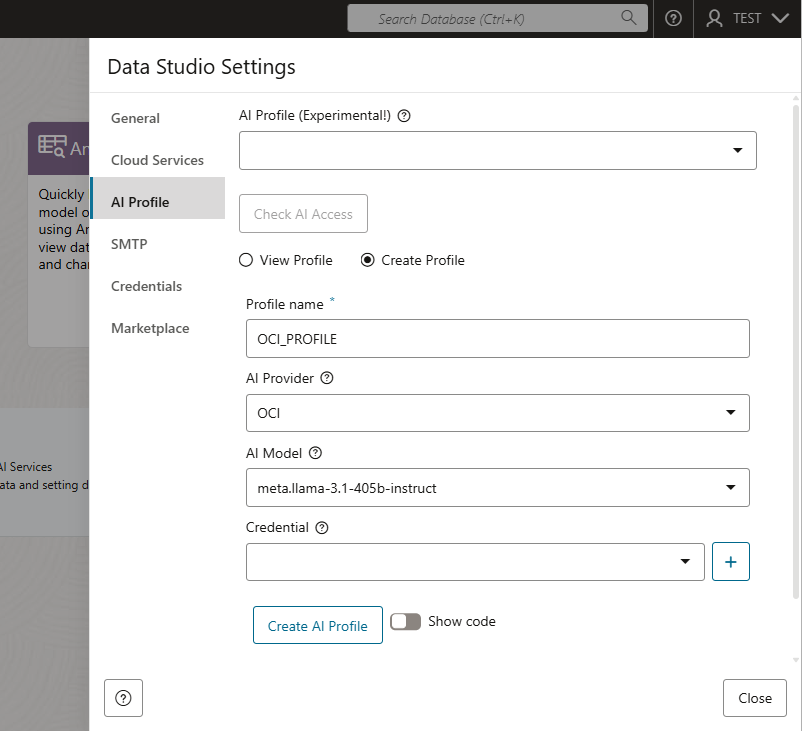
In this new window, you will see the AI Profile configuration. You can see that it is empty.
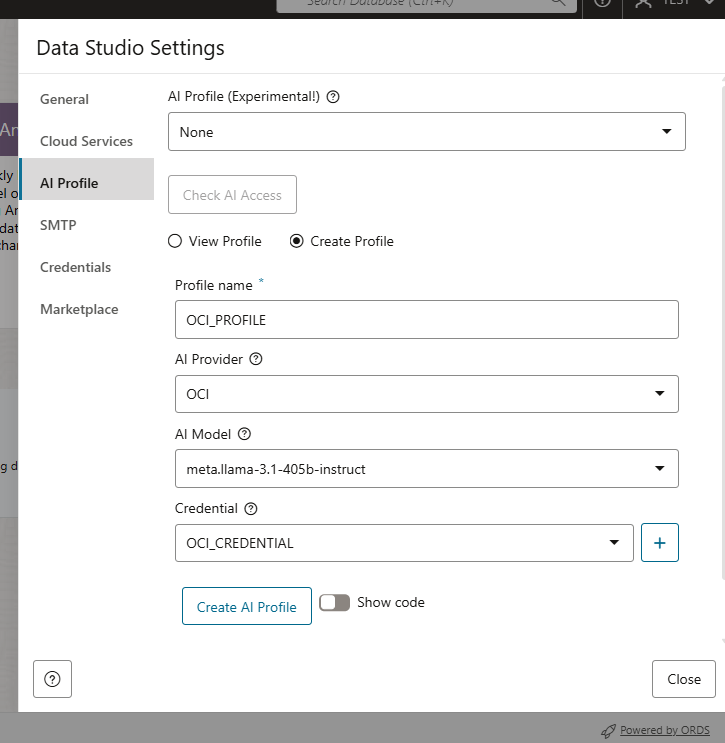
In order to use all the capabilities in Data Studio, we have to do this integration with OCI Generative Service. Therefore we are going to select OCI as the AI Provider.
A list of different models will be shown. I will use Llama for example, you can choose anyone. Then we have to create the credential, so the Data Studio can have access to the OCI AI Generative Service. Click on the “+” to create a new credential.
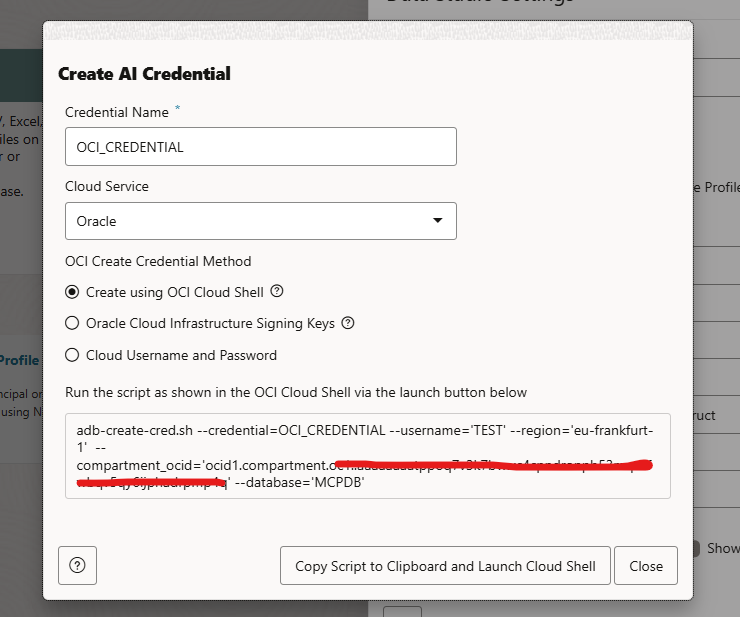
The first thing we need to do, is to provide a name for the Credential Name. There are many ways of creating the credential. If you are not an experienced user with OCI, the best option is to use the OCI Cloud Shell method. This will run a specific script in the cloud shell and it will create the credential for you. In case it can’t it will give you the code you need to run.
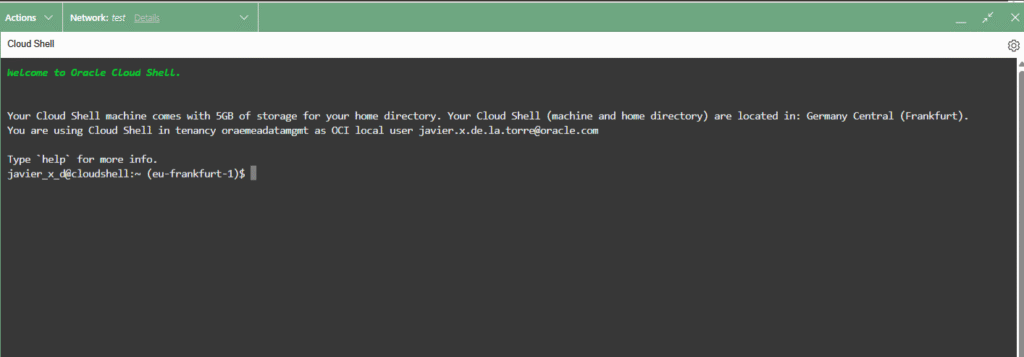
Select Copy Script to Clipboard and Launch Cloud Shell. A new web browser tab will open and the cloud shell will load. Copy and paste the script. You can execute as is.
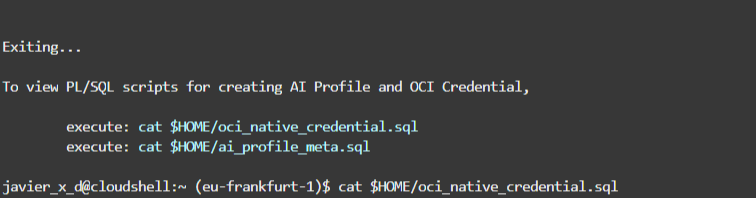
If it can create, it will generate the code for you. In this case I run the cat for oci_native_credential.sql as it contains the PL/SQL code to generate the credential with all the parameters filled. I copied the PL/SQL code and I run it over SQL Developer Web in the same Database Actions.
Once the PL/SQL has run successfuly, it will be shown as an option. You can click on “Create AI Profile”
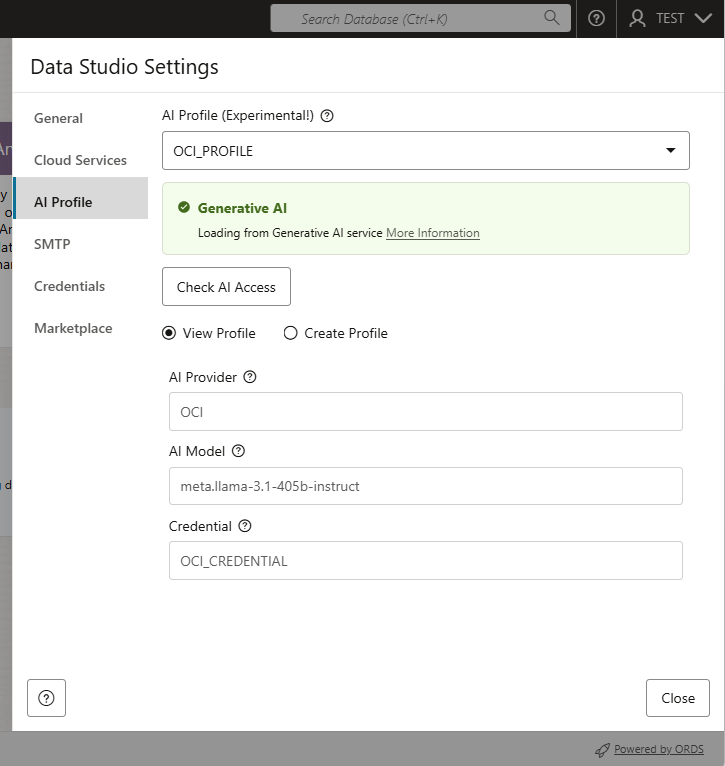
Once created, you can verify the access. You can click on “Check AI Access” and verify you can start using it!
That’s it! Very easy! Recently I recorded a video for YouTube where I explain many features used by the AI Profile. Below you have the video if you want to learn more!