15

When I saw the announcement that Gemini CLI now supports Oracle, I immediately wanted to try it. I’ve been following the evolution of CLI-based AI workflows for developers and data engineers, so seeing Oracle in the mix felt like the perfect excuse to test it in a real setup.
I didn’t want to try it with a local database just to confirm it “works.” I wanted to connect it to Oracle Autonomous Database, because that’s the environment I actually care about in practice. If this integration is going to be useful for day-to-day work, it has to work with Autonomous, secure connections, and a VM-based terminal workflow.
In this post, I’ll share the exact configuration I used, the issues I ran into while getting it to work, and the final setup that allowed Gemini CLI to connect successfully to Oracle Autonomous Database.
NOTE: When writing this blog, I’m using the beta.
For testing purposes, I took advantage of OCI and I created a new VM based in Ubuntu. In this VM I will install the Gemini CLI and I will connect it to the Oracle Autonomous Database. The documentation for installing the Gemini CLI is here and I realized that I needed Node.js 20.0.0+. I run the following commands to install it, including the Gemini CLI.
sudo apt update

sudo apt install -y curl ca-certificates gnupg

curl -fsSL https://deb.nodesource.com/setup_20.x | sudo -E bash -

sudo apt install -y nodejs

sudo npm install -g @google/gemini-cli
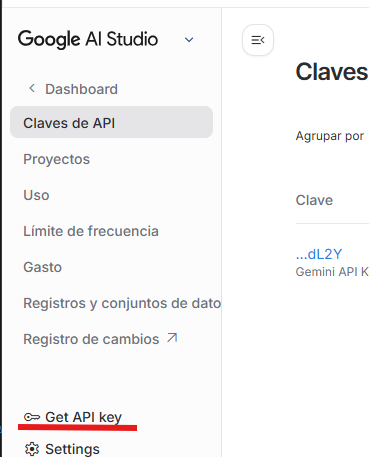
As this is a test, I will use the FREE plan from Gemini CLI. The only thing that I need is my Google account. When authenticating, I need a key that can be generated from Google AI Studio. You can go there and generate yours. Save the key because you will need it later!
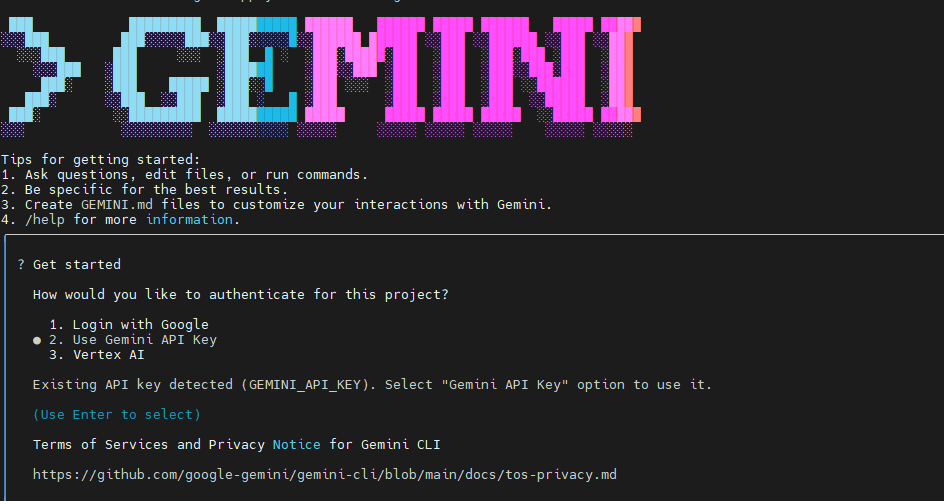
Now is the moment to start Gemini CLI. However, before we start, we need to define the variable with the API key generated before in this way:
export GEMINI_API_KEY="your_key_google_studio"
Now we can run gemini and chose the Gemini API Key.
Now is the moment to install the Oracle DB extension. You can find the full documentation here. But it is as easy as running the following command:
gemini extensions install https://github.com/gemini-cli-extensions/oracledb
Checking the documentation, we need to define the following variables to connect to the Oracle Autonomous Database. I tried different options but I got many errors, this is the way it worked. You need to define the user, password and the connection string. It is important to have the ssl=true to make it work.
export ORACLE_USER="your_oracle_user"
export ORACLE_PASSWORD="your_user_password"
export ORACLE_CONNECTION_STRING="adb.eu-frankfurt-1.oraclecloud.com:1521/XXXX_autonomous_medium.adb.oraclecloud.com?ssl=true"
Also, remember to open the firewall to connect to the Oracle Autonomous Database!
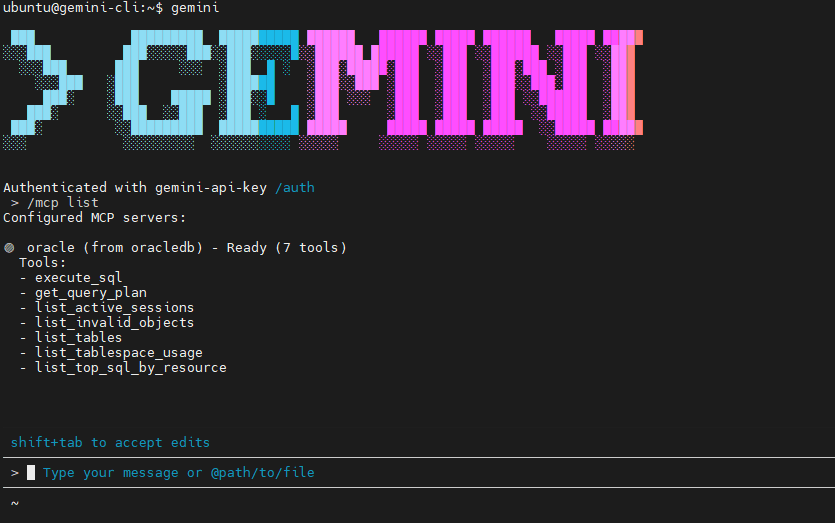
Now if we run gemini again, we are able to find the tools for the Oracle MCP!
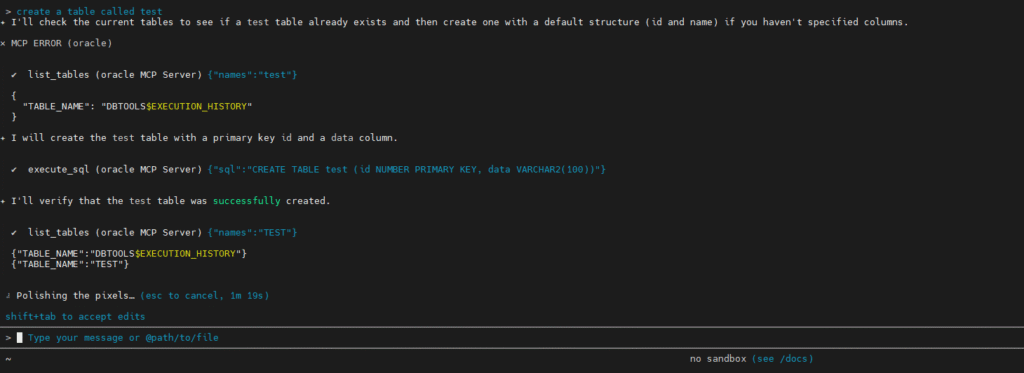
I wanted to run just a simple test, just create a table called test. I will run more tests for following blogs!
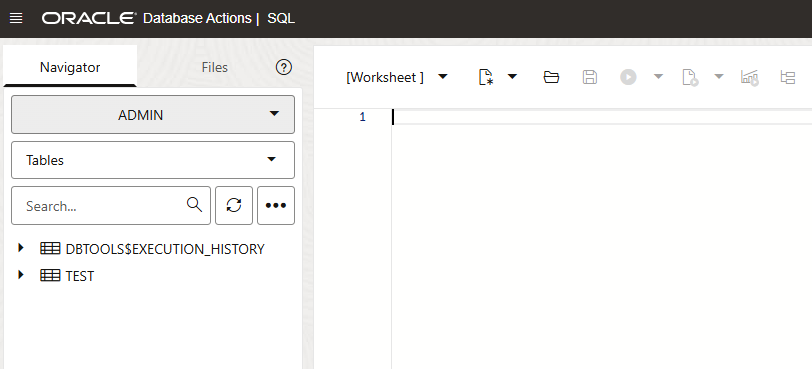
Coming back to Autonomous Database Actions, I’m able to find the table created via Gemini!
It is clear it is a beta as getting Gemini CLI connected to Oracle Autonomous Database required a bit of troubleshooting on the Oracle extension side. The main issues came from how the Oracle MCP toolbox handled connection modes: when OCI mode was enabled, it expected a local Oracle Client installation and failed with a missing client library error (DPI-1047), and when using a direct connection string, it required the correct TLS configuration (ssl=true) to avoid connection resets during the handshake. I also found that special characters in the password needed URL encoding because the toolbox builds the connection internally as a URL. Once those Gemini-side configuration details were adjusted, the Oracle toolbox initialized correctly and the connection to Autonomous Database worked.